Author Archives: Joe

Ambivalence Toward the Classroom Calendar

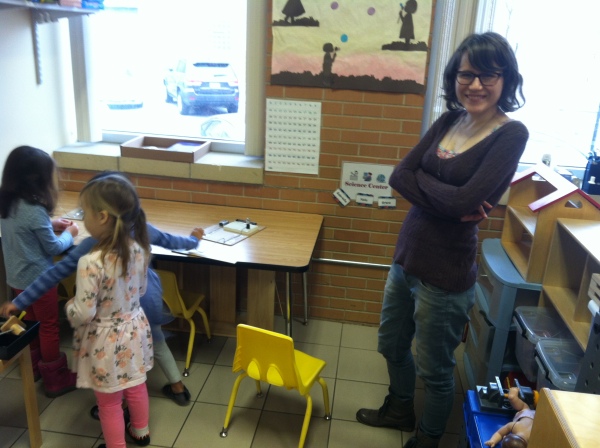
Photo Mar 23, 12 35 24 PM

Classroom calendars have been a mainstay in preschools and kindergartens for some time. You can find one in most classrooms. While some teachers have rejected calendar routines altogether, my feelings are more equivocal.

The daily calendar routine often represents a bit of a contradiction. Educators who scorn teacher-directed activities—or anything that has the flavor of direct instruction—paradoxically ask their students to sit and listen while they go over the calendar. If only one part of the day involves group instruction, then the calendar is a poor way to spend that time. It can become excessively repetitive, and its utility has limits.

However, calendar routines retain some considerable value. Here are some reasons I chose to keep the calendar but diminish its role, instead of removing it entirely.

Temporal Language

Young children often struggle to comprehend temporal language, yet we can’t avoid using such language with them. They ask “When?” question on a regular basis, and the words at our disposal—yesterday, next week, tomorrow, in the summer, last night, etc.—have limited meaning for young children.

That may seems an acceptable reality; generally, when a lesson is too challenging for children of a certain age, we simply postpone it. But young children are frustrated and confused by their failed grasp of temporal language. They want to know what is happening in their lives and when. If they’re better able to anticipate events, they can prepare for them, which gives them a sense of control, perhaps even fostering some self-efficacy.

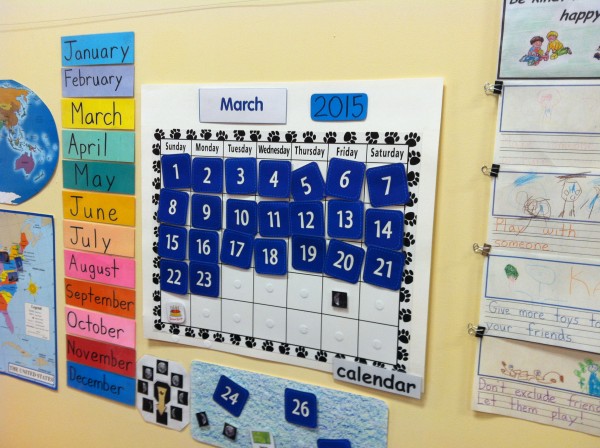
A calendar is a great tool for teaching about the passage of time, of course. It’s a visual representation that gives children a feel for how quickly the days, weeks, and months pass. Whenever a question arises about when something has happened or will happen, we reference our calendar. It is particularly valuable when preparing my students for a change in routines. As one example, before my recent vacation, I pointed out to my students which days I would be gone and when I would be returning. It helped quell some anxiety.

Applying Math Skills

Although the primary goals of our classroom calendar are stated above, a secondary purpose is to practice math skills. The calendar isn’t a great tool for introducing math concepts, but it provides opportunities to apply skills that we have learned elsewhere. Here are a few notable examples:

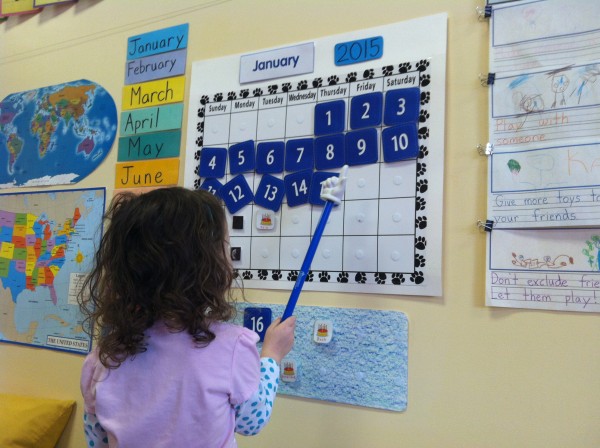
  • We count aloud, as a group, while a designated student points to all the numbers that have already passed in the month. Learning to count requires repetition. I find that repetition is especially helpful with numbers in the teens. Counting together can also help children learn to count with one-to-one correspondence (saying one number for each item). Also, children have a chance to practice recognizing numbers.
  • When it’s time to add a number to the calendar, I ask a student to look at the previous number and figure out what comes next. I say, “What comes after 12?” or “What’s one more than 12?” Early in the school year, many students have to back up and count a string of numbers leading up to the number in question (e.g., “8, 9, 10, 11, 12… 13!”). After some practice, most students no longer need to do that. It’s an important skill—one that Common Core for kindergarten specifically addresses.
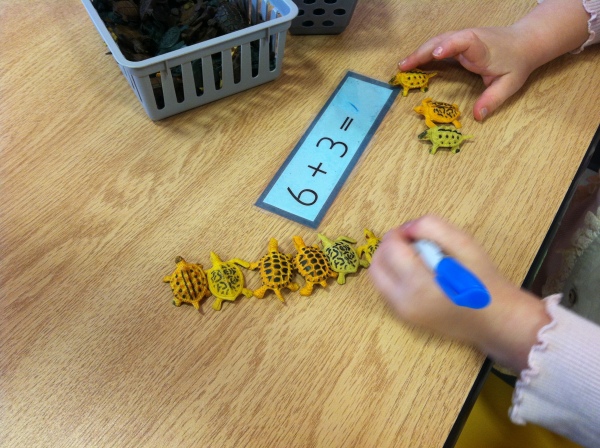
  • We often look at the calendar to figure out how many days remain before a holiday or event. For example, I might say, “Today is April 19 and Earth Day is April 22. How many more days until it’s Earth Day?” Once, I even wrote out the problem (19 + __ = 22), a very challenging yet throught provoking representation.

Our calendar is messy, with its seven-day weeks and its years broken into uneven months (there has to be a simpler way!), but it nevertheless offers a chance to apply numbers in a meaningful and engaging context.
Haggling: A Fun Way to Compare Numbers

Photo Mar 12, 7 01 40 AM

Maintaining a steady stream of engaging math activities is difficult. Math can become monotonous if there’s a lack of variety, yet children need to practice many skills repetitively before mastering them. So, my job is to regularly embellish basic skills lessons in unique ways. I must experiment and adapt regularly, because different groups of children have different interests.
A few years ago, as part of this tinkering, I decided to try a new game, wherein we pretended to negotiate the prices of classroom objects. The children loved it immediately, and it’s been a hit with every group of students I’ve had since.

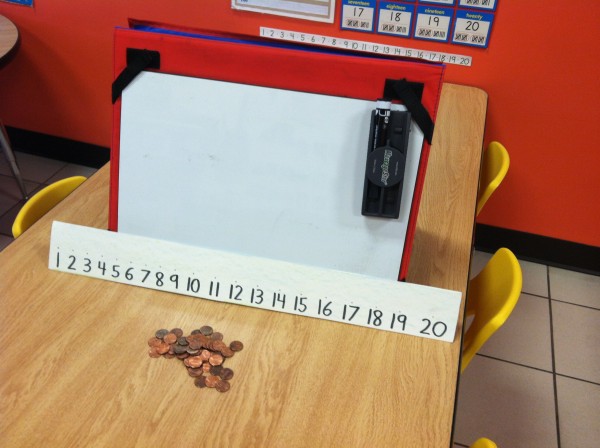
I use only a pile of coins, a number line, and whatever objects I choose to purchase. I begin by discussing the number line, focusing on three points: the numbers are in order, from left to right; each number we count is one more (one bigger) than the number it follows; and the numbers are less (smaller) if we move backwards on the number line (to the left). Number lines are tools that I expose my students to regularly, so our discussion for the purposes of this activity is usually very brief.

Next, I pull out an object (it can be anything), choose a student and say something like, “I want to buy this from your store. Now, you want to get a lot of my money, so you want me to pay a really big number. I don’t want that. I want to give you less—a smaller number of coins.”

Then the negotiations begin. I scaffold it heavily at first, saying things like, “I’ll give you one penny for this. Is that enough? Or do you want me to give you more pennies?” I point to the numbers on the number line after each offer. When we use comparative language (i.e., bigger, smaller, more, less), I gesture toward the left or right side of the number line accordingly. After each agreement is reached—most children accept my second or third offer, if not my first—The group helps me count as I pull out the appropriate number of pennies.

To keep children engaged, I use dramatic language, such as “What!? Are you crazy? I don’t want to give you that much money!” or “That’s all that you want? Really!? That’s not very many pennies.” I also use somewhat repetitive language. I often say the same thing two or three times in a row, but with slightly different words, interchanging words like more/less and bigger/smaller. I might say, “That number is too big for me. I want to pay less. I want to give you a smaller number of pennies. What if I give you a much smaller number, like two pennies?”

As the year progresses and my students develop more advanced math skills, I incorporate additional challenges. Instead of using a number line with numbers 0-20, we might reference a chart with numbers up to 100. Or, after we’ve had some practice with the concept of place value, we might use dimes and pennies to count by tens and ones as I’m preparing to make purchases.

Conceptual pedagogies aside, I mainly attribute the consistent success of this activity to the playful nature with which we carry it out. It offers many opportunities to alternate between silly jokes and math practice. Once, I purchased a student’s shoes, sending the entire class into a giggle fit. So, of course, I then pretended to be in a shoe store and went on to negotiate the purchase many more pairs. Young kids are an easy crowd, once they get to know you. Any time you can make them laugh while they’re learning, you’re doing pretty well.

Experiments with Melting Snow

IMG_5917

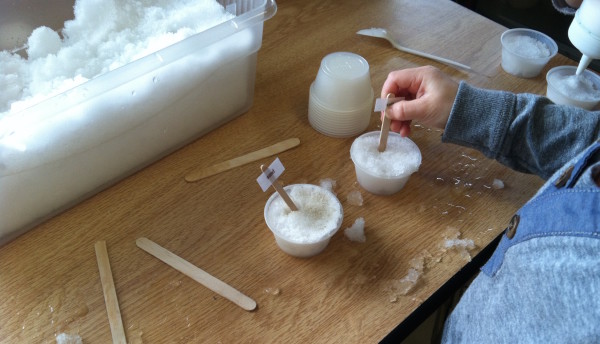
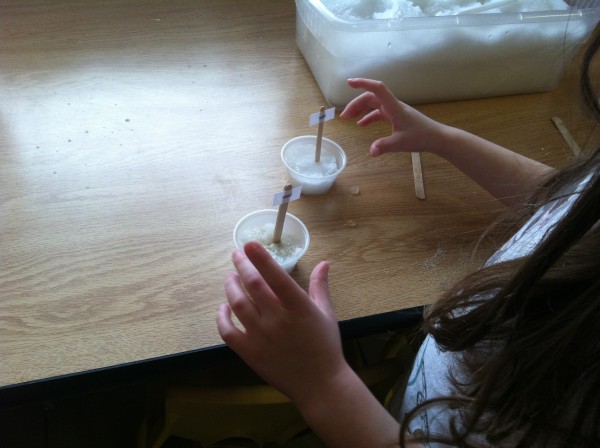
After a recent snowfall, my class ran some experiments with snow, salt, and sand. Science experiments have been prevalent in my classroom for many years. But until recently, most of them we carried out as large-group, teacher-led activities. I redesigned my science center this year, hoping to give children more opportunities to set up their own experiments.

Many students came with some prior knowledge about what salt does to snow and ice. We live in Chicago after all; snowplows are a familiar sight. I challenged some assumptions, however. I asked, “Are you sure? How do you know?” As a group we briefly talked about how experiments can help us see if something is true, and also help us learn new truths.

Getting Things Ready

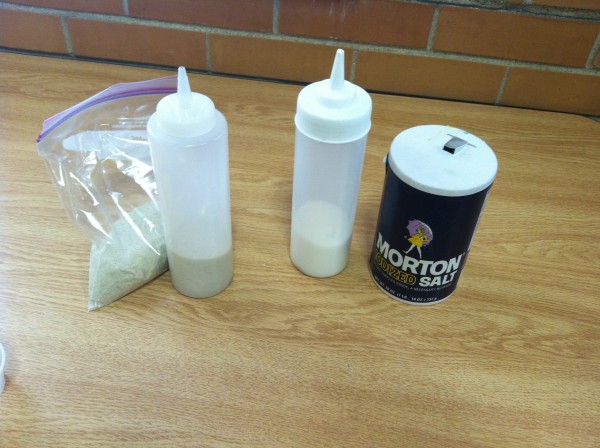
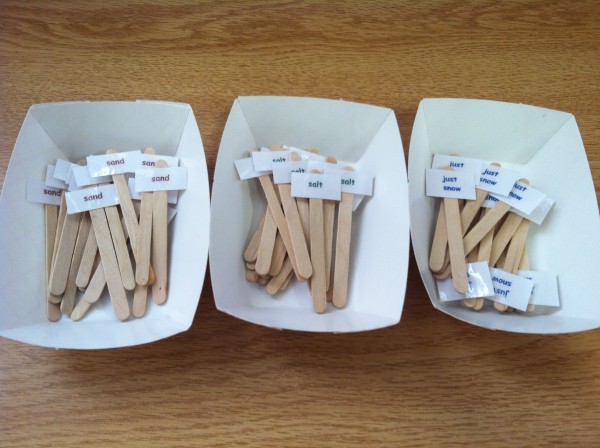
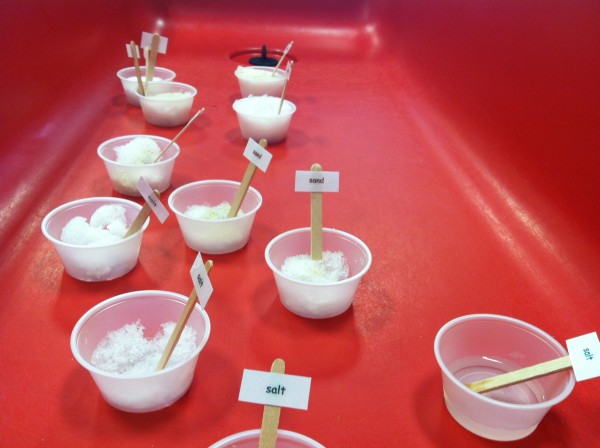
In preparation, I filled containers with snow and stored them in a freezer. If it’s in a fairly large container, the snow won’t melt for hours after it’s removed from the cold. Then I poured sand and salt into separate condiment dispensers. And I made small signs with the words ‘salt,’ ‘sand,’ and ‘just snow.’

IMG_5904

IMG_5903

My instructions were somewhat vague: fill two containers with snow, do something different to the two containers, and then watch what happens. I wanted children to make their own decisions about what to compare. I expected that we’d end up with a wide variety of arrangements, and we did.

Minutiae and Minor Setbacks

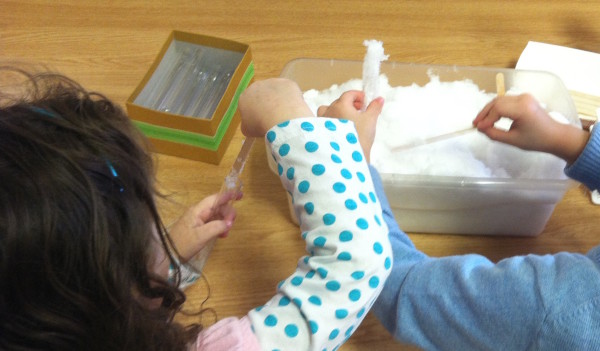
Things did not go quite as I had planned. (They rarely do.) At first, I had children filling small plastic test tubes with snow. I reasoned that it would be easiest to observe our results in test tubes, on a rack. But it was pretty difficult for the children to get snow into the small tubes. They became frustrated.

IMG_5892

On day two, I adjusted by setting out little round containers instead. It was harder to tell how much snow had melted, but students were able to set up their experiments much more independently.

IMG_5915

Another hiccup: children had trouble distinguishing between words on the tiny signs. I knew this would be a challenge, but I also thought it would be a nice way to incorporate functional reading skills into a fun activity. Alas, the words ‘snow,’ ‘salt,’ and ‘sand’ were too similar for most students to distinguish without significant support, which distracted them from main goals of the activity. I should have included tiny pictures of saltshakers, sandy beaches, and snowflakes.

Also, many students disregarded the word ‘just’ and placed ‘just snow’ signs in each of their containers. As a result, most containers were labeled as ‘just snow,’ even if they contained salt or sand, and I ran out of ‘just snow’ labels.

Perhaps the toughest challenge in designing activities for my new science center has been anticipating which minutiae have to be in place for an activity to succeed. It’s hard to think like a young child—it’s a big part of my job—and I’ve learned to expect that I’ll overlook some notable detail each time I roll out a new activity.

Results and Conclusions

Although things didn’t go as smoothly as I had hoped, this was a successful activity. Students were able to set up experiments independently, they were highly engaged, and they had fun.

We ended up with more “salt and snow” conditions than any other type, probably because it’s more fun to add more ingredients. The experimental conditions were not very well controlled, of course—nothing was precise. Still, most students walked away convinced that salt melts snow, and uncertain about the effects of sand. When students disagreed about their results, I used it as an opportunity to talk about the commonality of disagreement among scientists.

Most importantly, we saw how a simple comparative experiment can help us learn about the world around us. The scientific method, in its simplest form, is accessible to young children. All it takes is a little bit of scaffolding.

IMG_5924

The Value of Daily Communication

IMG_5884

Every afternoon, I sit down at my computer and compose an email for my students’ families. Although it’s a significant time commitment, it’s a routine that has become a very valuable part of my practice.

One day, eight years ago, part way into my first year as a preschool teacher, I chose to write a list of the morning’s activities on a piece of paper, which I left out for parents to read. The response was immediately positive. I started making lists regularly, and each day parents would crowd around to read about what we had done.

A year or so later, in a new city, at a new school, where my paper lists had been met with equal enthusiasm, I decided to try sending emails instead. Email, of course, has many advantages: It’s more efficient; I can send it after class, instead of being taken away from my students during class; it can’t be hindered by my unsightly handwriting; and most importantly, it’s available for parents to access whenever and wherever, not just when they come to pick up their children.

Gradually, my daily emails have become increasingly complex. They are now filled with descriptions of each part of the day, specific language that I use, links to any websites or tablet applications that we referenced or used, and links to photographs from each school day (with children’s faces excluded).

Drawing Connections Between School and Home

“What did you do at school today?” is probably one of the more frustrating questions parents must ask their children. Older children are likely to withhold information. Young children simply can’t remember. However, if you can ask a more leading question, such as, “What did you learn about dinosaurs today?” or if you look at a photograph and ask, “What did you do with those rocks?” then young children often reveal the wealth of knowledge and skills they’ve absorbed.

Some parents treat each of my emails almost like a book about the day at school, which can spark rich conversations. The photos, in particular, often make little sense without a student’s elaborations. A relatively small time commitment can help parents connect what their children are learning at school to what they are learning at home.

To be clear, it takes a lot of time to prepare and write my daily emails. I am fortunate to have dedicated peers and school leadership who agree that daily communication is highly valuable, and do what they can to support the practice. Soon after I began this routine, the school invested in new computers and the rest of our teachers adopted the practice. We haven’t looked back since, and I doubt we ever will.

Outer Space, Meteorites, and Scientific Thinking

I taught my students about outer space last month. We learned many facts about planets, stars, and more. But while science education for young children often emphasizes the factual knowledge, I want my students to do more than regurgitate. I want to foster an early understanding of scientific methods, because it’s not the products but the processes that set science apart.

When we talk about science, I often remind my students that scientists try to learn new things. That means they come up ideas—hypotheses—that might be wrong. Sometimes, scientists must change what they think.

Pluto offers a nice example. Every year, a few students enthusiastically declare that Pluto is no longer a planet. But if I ask follow up questions, they usually reveal that they think Pluto changed in some way—that it was a planet until something happened to it. Of course, the only thing that changed is in our heads. Scientists used their instruments to learn more, and that changed how they think about Pluto.

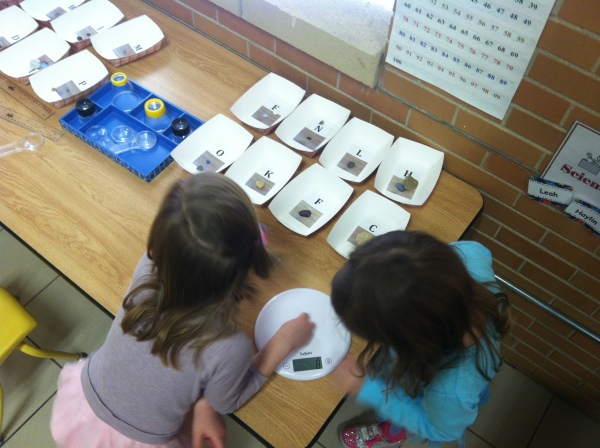
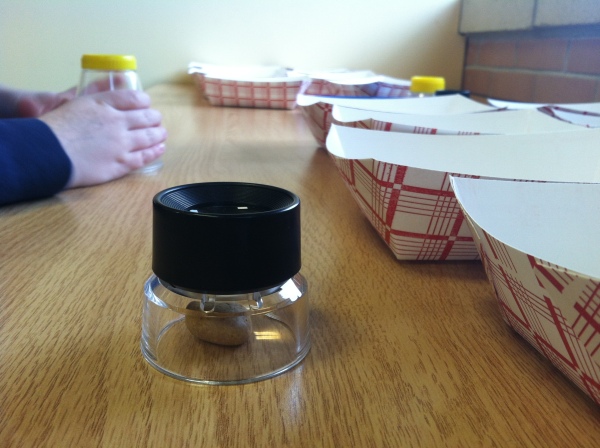
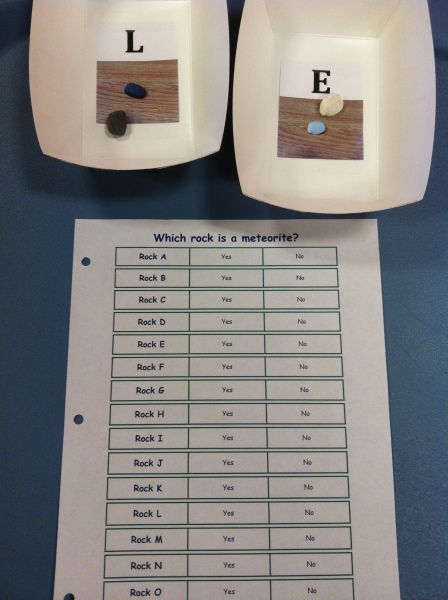
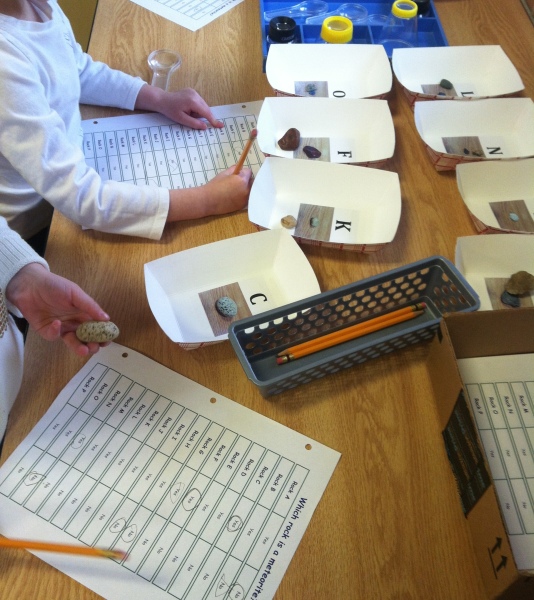
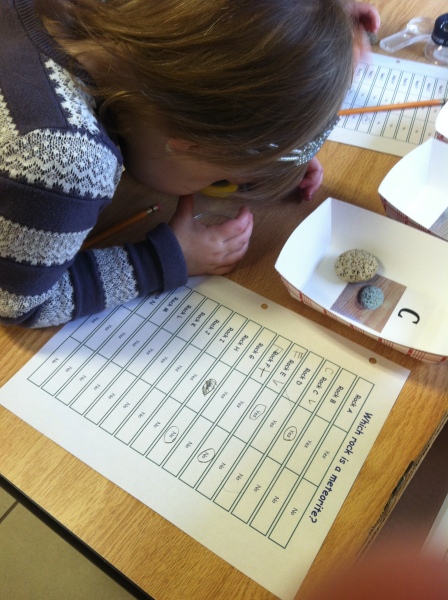
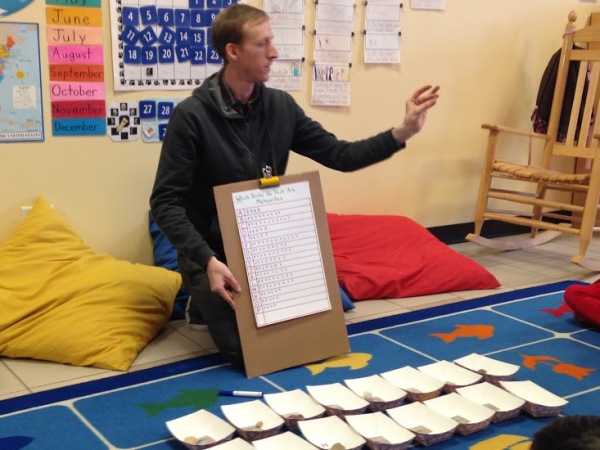
To give my students practice making their own hypotheses and changing what they think, I set up an activity with meteorites. I put out sixteen rocks and told them that some had come from outer space and crashed into the earth. I challenged them to come up ideas about which ones were from outer space. They weighed the rocks with our scale, and looked at them with various magnifying glasses. I asked many open-ended questions to flush out students’ reasoning.

IMG_5961

IMG_5991

A handful of hypotheses emerged. Some students thought that meteorite must have “holes” (craters) like the Moon and Mercury. Some thought that the meteorites would have to be a certain color, perhaps black. Some looked for scratches caused by crashing into the earth. And some students were more vague, saying things like, “I just think it looks like a space rock.”

On the third day, I asked students to start recording their ideas on a chart. Each rock had been assigned a letter. Students circled ‘yes’ or ‘no’ for whether they thought each rock was a meteorite. On subsequent days, I reminded them that they might want to change what they think, and many did.

IMG_6016

IMG_6025

IMG_6029

When I was ready to wrap things up, we sat down to have a summary discussion. We began by making a graph that represented how many students thought each rock was from outer space. There was some consensus, but much disagreement.

Meteorites Graph

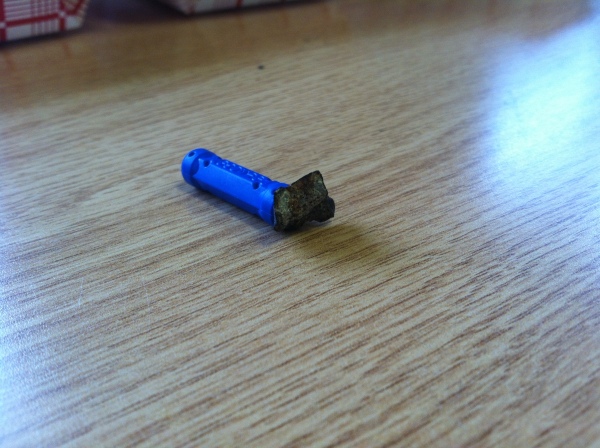
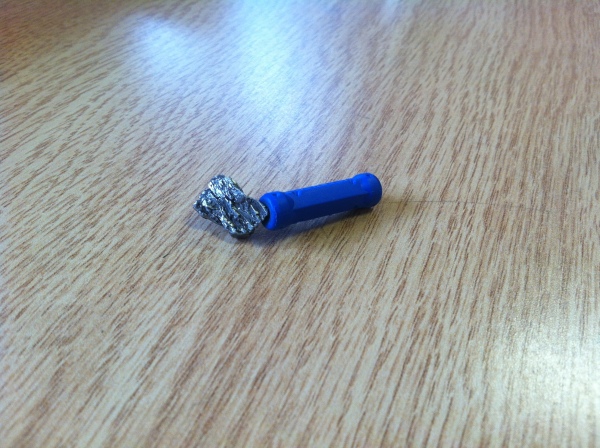
Then I pulled out my computer and together with the class did some (staged) research on what meteorite scientists have learned, because they have looked at many more rocks than we have, and they have done experiments on them. We learned two pieces of useful information. First, meteorites are heavier than most rocks of the same size. Our rocks varied in size and some of our small rocks weighed little enough that they wouldn’t register on our scale, so to avoid confusion I moved on. Second, because meteorites have iron in them, they will stick to strong magnets. We pulled out some strong magnets and tested each rock. We found two that were magnetic. (They are, in fact, meteorites; I purchased them here.)

IMG_6113 IMG_6112

Now, I don’t really care if my students learned that meteorites are magnetic. That wasn’t my goal, so I didn’t stress that point. Instead, I emphasized the way new information had changed what we think. I asked, “What did you think before? What do you think now? Have you changed your mind?” One or two students maintained their previous positions. If they were scientists, I told them, they would need to learn more about meteorites. Then maybe they could make the rest of us change what we think again.

New App Reviews: February 2015

It’s been a while since I’ve sifted through a group of new-to-me iPad apps, so I have a long list. If you want to read descriptions and criticisms of these apps and many others, follow the menu at the top right corner of this web page.

The following apps have earned my highest recommendation:

These apps I somewhat recommend:

These apps I do not recommend:


Our Writing Center

I regard the writing center in my classroom as one of my biggest long-term successes. My students write often, they enjoy it, and they do so relatively independently.

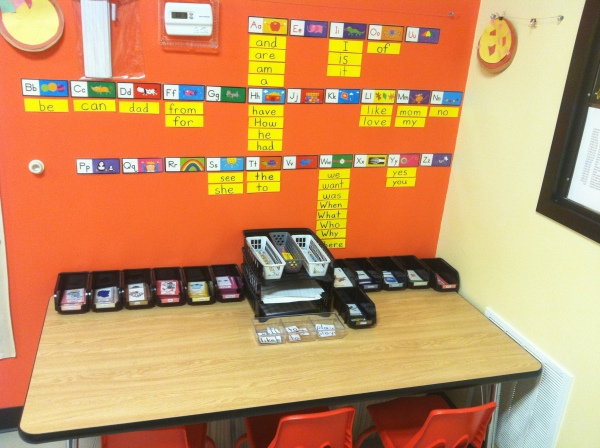
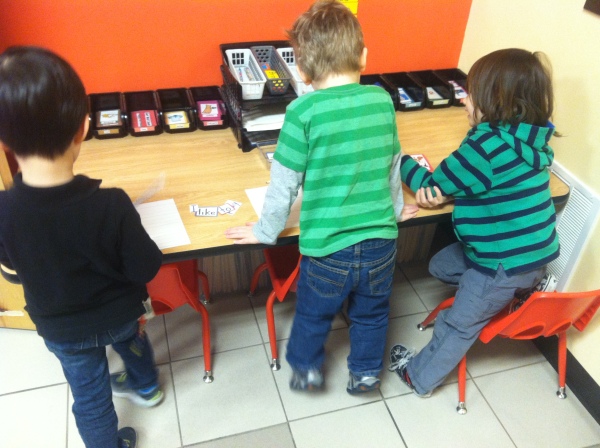
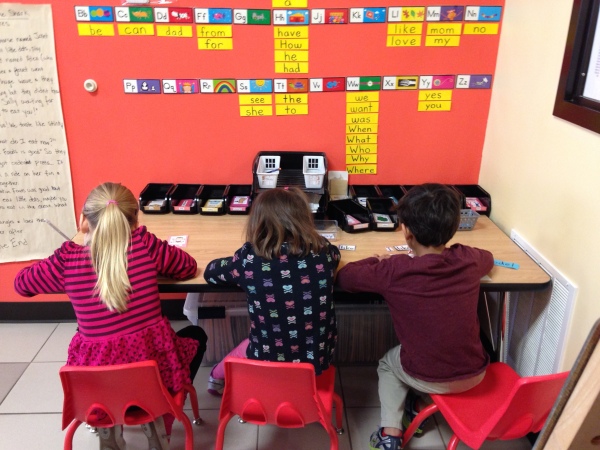
I redesigned my writing center many years ago. The first step was to create a space in the classroom just for writing. I acquired an extra table, tucked it into a corner, and covered the wall with letters and sight words. As soon as we had a space dedicated to writing, students began to write much more.

IMG_6071

I explain to each of my students that the writing center is for writing letters, words, and sentences; if children want to draw and color, that’s great, but I ask them to do so in the art center.

The content of students’ writing, however, is entirely their choice. I regularly suggest new words and/or sentences, but students usually have their own ideas. I attribute the success of my writing center largely to the degree of choice that students have.

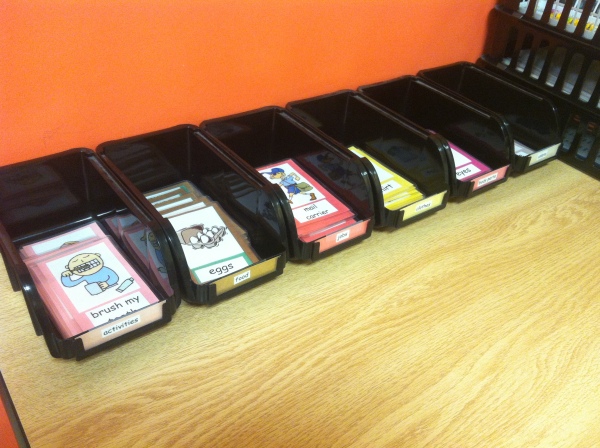
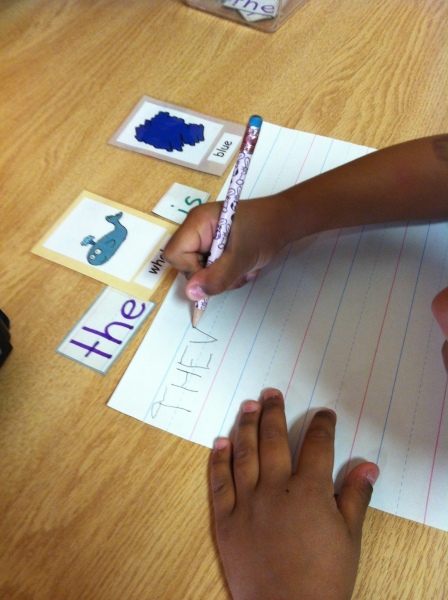
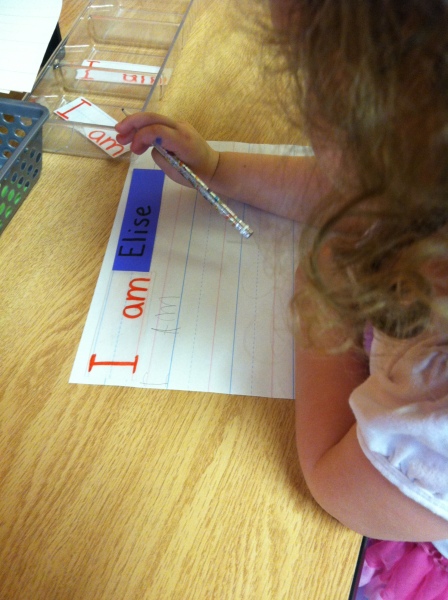
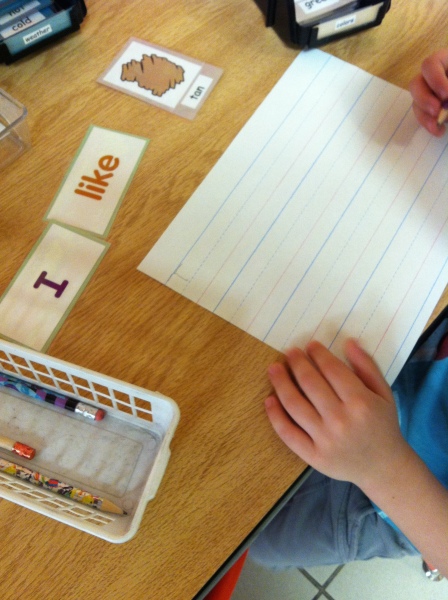
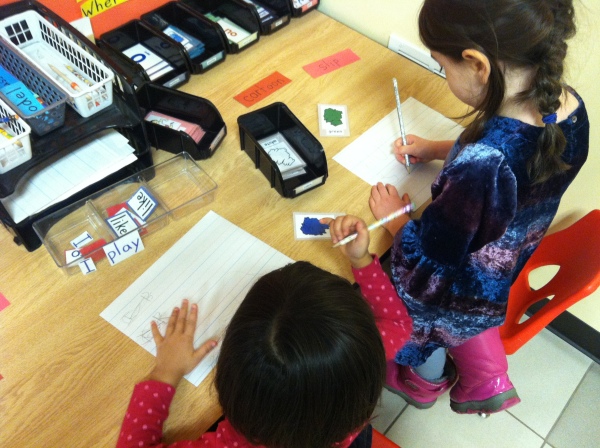
I make a variety of materials easily available. Hundreds of small cards that have pictures and accompanying words (foods, jobs, colors, body parts, number words, clothing, and much more) are always on the table in small trays. Another container has word strips that have a student’s first name on one side and his or her last name on the other side. Paper and writing implements are on the table, too, of course—we usually use pencils, but sometimes markers, crayons, and other things.

IMG_6073

Often, students will choose to make lists of individual words by copying the words on our cards. That’s fine, especially when students work hard on long lists, as they often do. My goal, however, is to get students excited about communicating ideas with written words. To do so, I set out groups of simple words that can be used to create sentences. Some simple examples are “I like [color, food, etc.]” and “I am [age, adjective, etc.]” As the year goes on, I introduce more complicated sentences, such as, “I want to be a [job].” or “Today is [weather] and yesterday it was [weather].”

Suggesting different sentences such as these serves a second function: students are introduced to a variety of basic sight words. Writing meaningful sentences is a rich, natural way to learn words. Without flashcard-type memorization activities, my students learn to use a good number of functional words.

Photo Sep 29, 10 31 42 AM

Photo Sep 02, 10 24 21 AM

Photo Oct 16, 11 01 49 AM

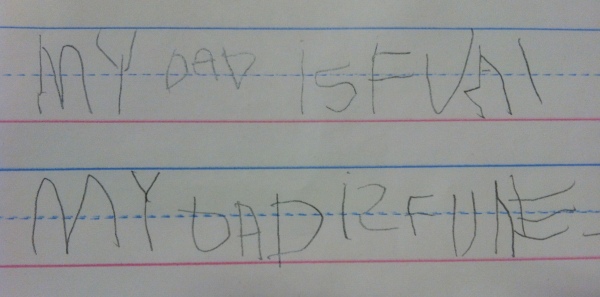
We also use the writing center to practice phonics skills. When children want to write words that aren’t readily available, I ask them to write the letters for all of the sounds that they can hear in the words. Then, I get to act like detective and try to figure out what they wrote. It’s fun. Try deciphering these:

Photo Oct 29, 10 59 22 AM

IMG_2983

IMG_1493

Finally, as is the case with most of our classroom activities, I urge children to be silly in the writing center. I try to make students laugh with my sentences, and I encourage them to make each other laugh. Sometimes, all it takes is an extra word. Instead of writing, “I like broccoli,” I might write, “I like blue broccoli.” Not every student chooses to write silly sentences, but the ones who do often turn into the best early writers.

IMG_6068

IMG_5931

IMG_0198

Experimenting With Electrons

IMG_5492

We recently had a visitor in our classroom. Emily Conover is a physicist and science writer who earned her Ph.D. in high energy physics. She offered to teach my students a little bit about particle physics and to set up an exciting experiment for our new science center.

I talk to my students about scientists frequently. Whenever there’s an opportunity, I ask them to think like a scientist. Sometimes I wonder if they ever ask themselves, “Why does Joe talk about scientists so much? Can’t he just answer our yes-or-no questions?”

I also wonder what our youngsters picture when I start talking about a scientist. Is it something vague? Is it a man with glasses, pouring liquids into beakers? Having a real life scientist in our classroom gave us a better idea of what a scientist can be like. Emily shared some photographs of some of the instruments she helped build, and of the laboratory in Chooz, France where her experiment is carried out.

Particles and Electrons

Emily also taught us about particles. We learned that everything is made up of very tiny things, much too small to see. Bigger things you can break apart. We can break a cookie, for example, into smaller and smaller pieces. But when it’s as small as a particle, you can’t break it up anymore. That lesson was pretty abstract for our youngsters, but it was a nice introduction.

Next, she taught us about one particle called the electron, which sounds a lot like the words ‘electric’ and ‘electricity’ because when we use electricity, we send tiny electrons through wires.

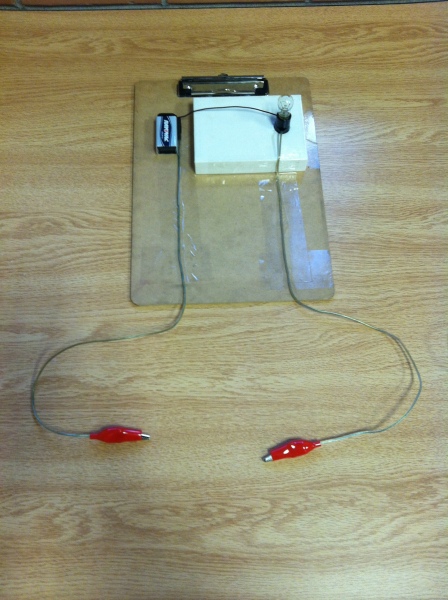
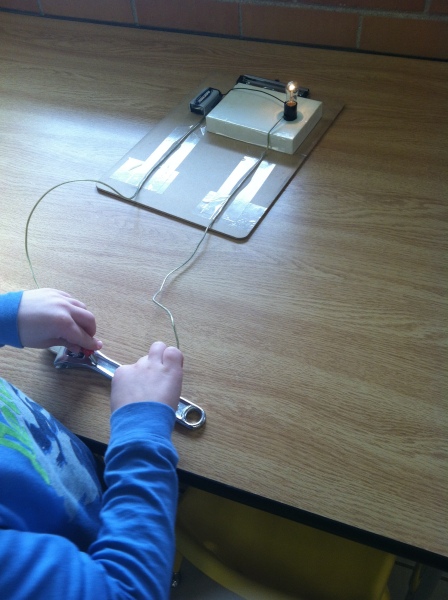
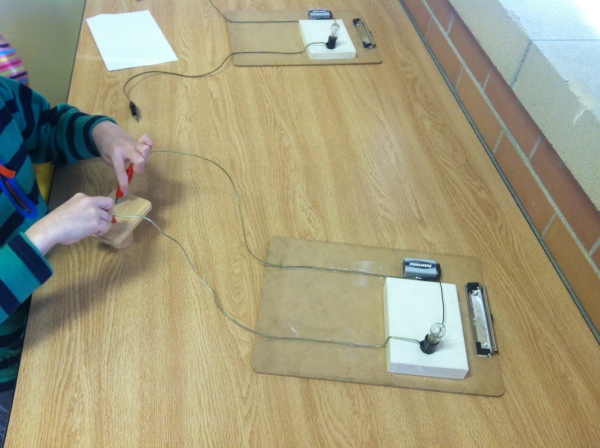
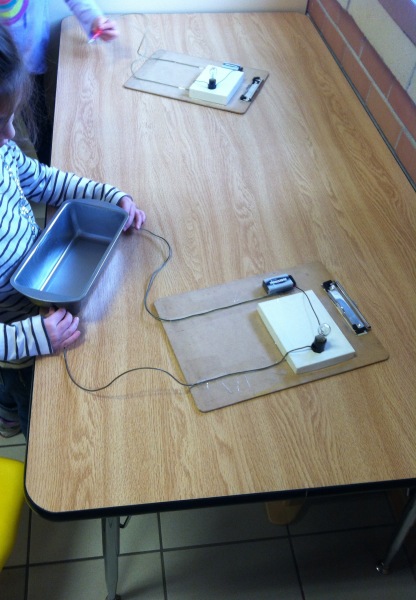
Knowing that electrons can go through wires, we asked the scientific question: what else can electrons travel through? To test it, Emily and I set up a small light bulb, attached to a nine-volt battery, with a break in the wire. We explained that the light bulb would only turn on if the electrons from the battery could go all the way around to the light bulb.

Photo Dec 12, 7 40 08 AM

Note: we took a minute at this point to talk about safety. We certainly don’t want children going home and playing with wires. We explained that electricity is very dangerous; our experiment was safe only because we used very small batteries.

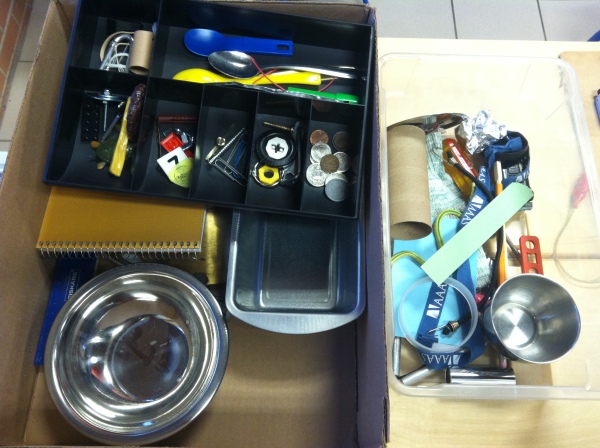
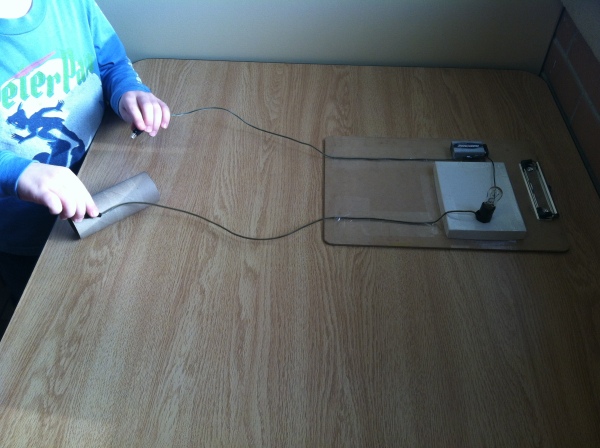
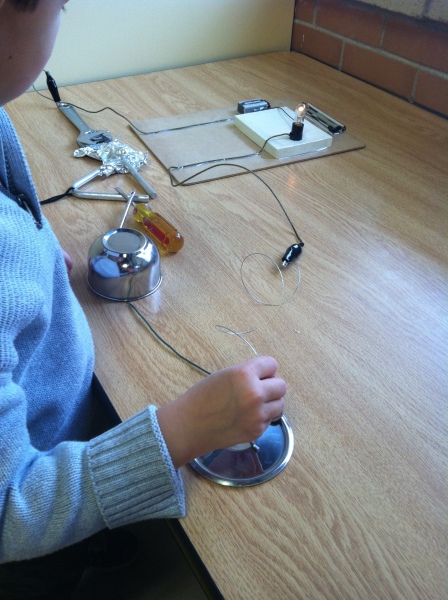
We then set the children loose in our science center and let them experiment, sending electrons into each object and checking to see if they made it all the way to the light bulb. I set out a variety of objects—different shapes, sizes, and materials—and I invited the children to pick other classroom objects or toys to try.

Photo Dec 12, 7 47 27 AM

In a matter of minutes, a group of students had discovered that metal seemed to be key. Word spread quickly among the rest of the class, but everyone was eager to test it out nonetheless.

A few metal objects did not work: a non-stick pan and some metal objects with paint on them. They offered opportunities to reevaluate our assumptions, which is the type of thinking I aim to facilitate. Scientists often must change what they think, as I regularly remind my students.

Photo Dec 18, 10 22 18 AM

Photo Dec 18, 10 24 04 AM

Photo Dec 18, 10 36 22 AM

Photo Dec 12, 11 03 13 AM

One student was particularly interested in seeing whether electrons could travel through a chain of objects.

Photo Dec 19, 11 05 55 AM

We purchased most of the materials that we needed at RadioShack. It took some time to put things together, but it was fun. I’ll hang on to them and use them again in coming years.

I want to thank Emily for thinking of an excellent idea, for carrying it out beautifully, and for taking the time to visit us. My students were lucky to have you.

A Revitalized Science Center

Photo Nov 25, 10 26 35 AM

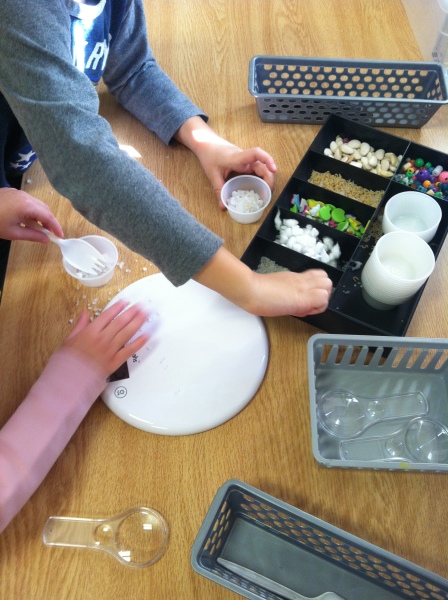
One of my big goals for this school has been to expand science education in my classroom. I’ve always given my students a pretty healthy dose of science, but much of it came in the form large group activities and discussions. Every year, we learn about many scientific topics, and we run many experiments as a group. But we lacked a dedicated space where children could independently engage in scientific activities on a regular basis. So I rearranged my classroom and made room for a new science center.

A typical preschool science area contains a few basic tools: magnifying glasses, a balance,  rulers, a tape measure, magnets. Children enjoy using these tools, but I’ve found that their novelty wears off rather quickly. Unless they’re given new purposes, they’re soon used used as props in imaginative play scenarios more often than as scientific tools. I don’t have a problem with that–in fact, I left some of our old magnifying glasses with the kitchen toys, where I would often found them–but I wanted to have a set of tools set aside exclusively for scientific activities. These are the items I purchased:

  • Magnifying Glasses. Probably high up on any list of scientific tools. I got a few different kinds of magnifiers. These standard magnifying glasses have both 3X and 6X magnifiers on them. However, it takes a little bit of skill to focus them. Many students prefer to use these little “bug boxes” or these “pre-focused” magnifiers. I usually set them all out.
  • Rulers and Tape Measures. Which type probably doesn’t matter much. I got these translucent rulers and I already had some small tape measures that work well.
  • Scale. Instead of a balance, I decided to get a scale. Young children tend to want to fill balance buckets with as many objects as possible, which becomes a bit of a distraction from the concepts they’re designed to teach. A scale has the advantage of injecting numbers into our science activities. My students can still compare the weight of two objects; it just takes an extra step. (I have a number chart on the wall in the science center, for students to reference.) It was tough finding a good scale. I settled on this digital scale, which has a grams setting. Most digital scales that use ounces or other units show a decimal point, which confuses young students. A digital scale that’s set on grams usually doesn’t include decimals.
  • Small Containers. I gathered a variety of small containers, which we’ll be using to run experiments. Most were old plastic containers I had in storage, but I also purchased these plastic test tubes.
  • Tweezers. We might want to handle some very small objects at some point. I wasn’t sure if the kids would be interested in these tweezers, but they love them. They want to use them for everything, so I remove them when we’re handling fragile objects.
  • Stop Watch. I’m still unsure how exactly we’re going to use this, but I want to give my students some experience measuring time. I purchased this timer because, as with our scale, it doesn’t show decimal points.

Preparing Activities

Acquiring new tools was the easy part. The challenge has been preparing a steady series of interesting activities for my students to engage in. There are a lot of early-science resources available, but they often have limitations. Most of the activities I’ve found fit in one of two categories: (1) run an experiment that is largely teacher-directed, or (2) offer various items (often from nature) for students to examine. Teacher-led experiments we do carry out regularly, but they don’t fit well in a learning center that’s driven by student choice. Exploratory examinations are going to be a regular fixture in our new science center, but they lose their appeal if offered too regularly, and I don’t want to stop there.

I want my students to manipulate things and make simple comparisons. I want them to interact with objects, come up with ideas, and then test their ideas. Young children can understand the scientific method at a basic level; they’ve shown me consistently. They’ll learn it even better if I give them abundant opportunities to practice. It’s going to take some creativity and some hard work, but I’m looking forward to the challenge. Stay tuned for updates on my recent efforts.


Unraveling Developmental Standards

Photo Sep 15, 10 59 50 AM

I recently took the time to unravel some developmental standards. I often share a list of standards with my students’ families, so that they know how their children compare to expectations. With a round of parent/teacher conferences approaching, I decided it was time to revise what I had been passing along.

As a pre-kindergarten teacher in Illinois, there are two main sets of standards that I regularly reference: the Illinois Early Learning and Development Standards (IELDS) and the Common Core State Standards (CCSS) for kindergarten. Much of the IELDS is below the level of my average students, whereas the kindergarten CCSS contains many standards that are very challenging. I try to be mindful of both, because my students generally fall somewhere between the two sets, and because I want my students to be prepared for what they will encounter after my class.

Reading through the standards is valuable but difficult. Doing so reminds me of areas I could better address with my students, and topics I should more deliberately incorporate. But the standards are lengthy, sometimes repetitive, and often difficult to navigate. The CCSS is on the Common Core website, but not as a single document; one must navigate various links to gather all the information. The IELDS is a prodigious 134 pages (pdf); I would not expect many educators to read it, much less parents.

To make things more manageable, I compiled the text of the standards into single documents (which took much longer than I anticipated). Next, I made a page on my website where that text can be viewed (or downloaded as Microsoft Word documents). Then I pared down and compiled the standards into a list of benchmarks that I want my students’ families to be most aware of. I also provide links to the full lists, for those ambitious and curious parents who want to read all of the standards.

Illinois Early Learning and Development Standards

Common Core State Standards – Kindergarten

Enjoy!